 |
|||
|
|
|||
|
|
|||
| ||||||||||
|
|
 TM 3-4240-302-30&P-3
LOCATION
ITEM
ACTION
REMOVAL
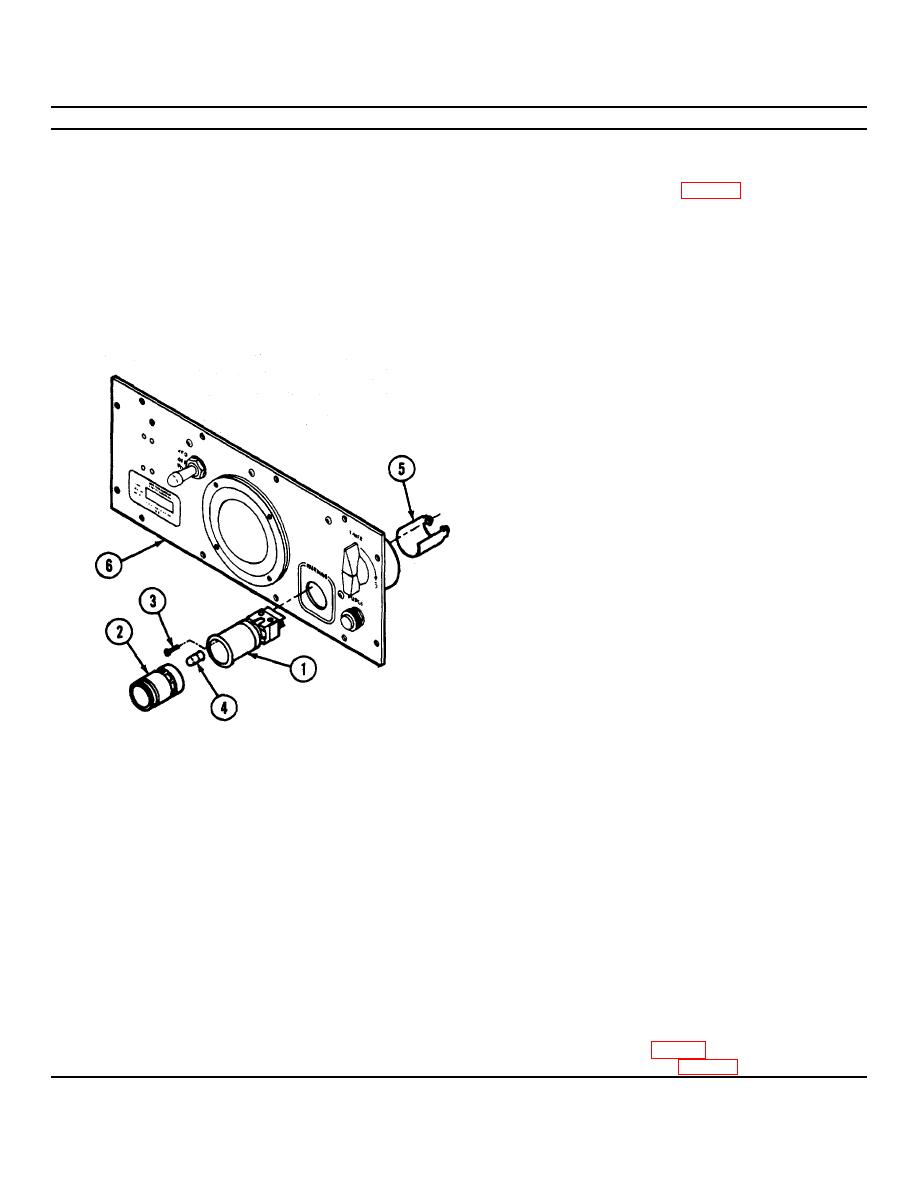
Panel
LOW PRESSURE
1. Disassemble PECM (p. 2-33).
switch/indicator light
2. Unsolder and tag wires from LOW PRESSURE
DS4/S5
switch/indicator light DS4/S5 (1). Remove
twine lacing.
3. Pry out and remove lamp module (2).
4. Remove two screws (3) and two lamps (4).
5. Remove sleeve (5) from back of panel (6) and
pull LOW PRESSURE switch/indicator light
DS4/S5 (1) from front of panel (6).
INSTALLATION
1. Insert LOW PRESSURE switch/indicator light
DS4/S5 (1) in panel.
2. Place sleeve (5) over LOW PRESSURE
switch/indicator light DS4/S5 (1) and secure
with screws (3). Install lamps (4).
NOTE
Lamp module (2) is keyed to fit into
LOW PRESSURE switch/indicator light
DS4/S5 at only one rotational position.
It may be necessary to turn the lamp
module (2) to find the keyway.
3. Press lamp module (2) into LOW PRESSURE
switch/indicator light DS4/S5 (1).
4. Connect and solder wires to LOW PRESSURE
switch/indicator light DS4/S5 (1). Refer to
wiring diagram (p. 2-44).
5. Reassemble PECM (p. 2-33).
2-35
|
|
Privacy Statement - Press Release - Copyright Information. - Contact Us |
