 |
|||
|
|
|||
|
Page Title:
Section IV. CLEANING, INSPECTION, AND REPAIR |
|
||
| ||||||||||
|
|
 TM 11 5840-270-24-1
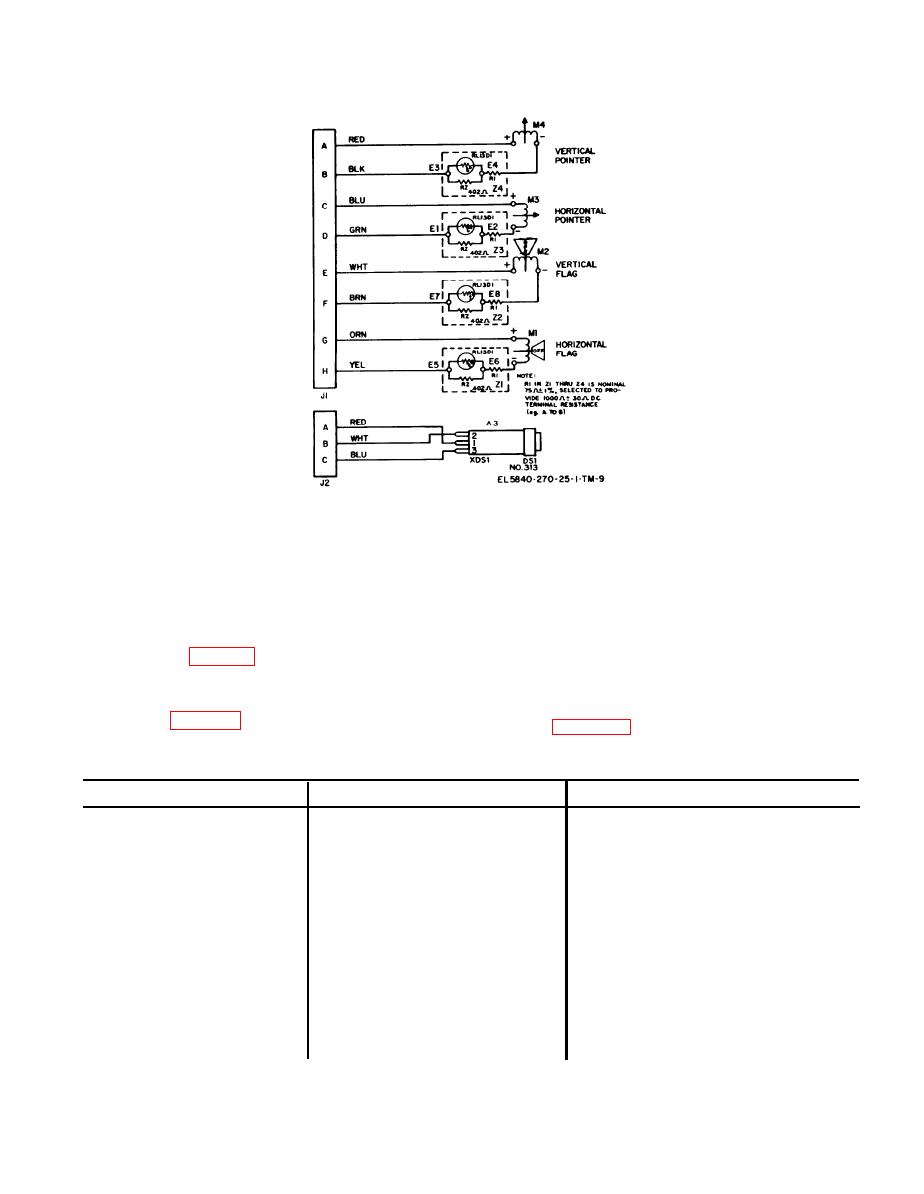
Figure 4-5. Schematic diagram.
Section IV. CLEANING, INSPECTION, AND REPAIR
4-14. Cleaning
4-16. Repair
After disassembly, clean the parts of the indicator
Except for minor dents and scratches, no repair is
as specified in table 4-1.
possible. Replace all parts that are defective or
damaged. If a meter mechanism or compensating
4-15. Inspection
network is replaced, R1 on the network may
Inspect all parts of the disassembled indicator as
require changing to obtain 1000-ohm terminal
indicated in table 4-1.
resistance (para 4-20).
Table 4-1. Cleaning and Inspection of Indicator ID-48A/ARN
Inspection
Part
Cleaning
Mechanism Ml, M2, M3, M4.
Inspect for loose or broken wires and
Movements . . . . . . . . . . . . . . . . . .
Remove any fuzz of lint using a soft
loosely mounted pivot bases.
bristle brush or low pressure air
source. Do not use cleaning fluid.
Inspect for bent or dirty pointer, loose
Pointers . . . . . . . . . . . . . . . . . . . . . .
L u m i n e s c e n t painted surface may
balance weights or chipped surface.
be cleaned with benzine.
Pointer should be perpendicular to the
moving coil and parallel to the dial
when mounted.
None.
Clean with acetone. . . . . . . . . . . . .
Pointer Stops . . . . . . . . . . . . . .
I n s p e c t for poor solder joints, loose
C l e a n connections and terminals
Wiring a n d S o l d e r e d C o n -
before resoldering.
connections and mounting, broken or
nections.
shorted wires.
Clean dirty markings with a cloth
Inspect for chipped or dirty luminous
Dial MP11 and Mask MP4.
moistened with benzine.
marking.
Wipe clean with soft cloth.
I n s p e c t for scratched or broken glass,
Window MP5 . . . . . . . . . . . . . . . .
loose mounting.
4-6
|
|
Privacy Statement - Press Release - Copyright Information. - Contact Us |