 |
|||
|
|
|||
|
Page Title:
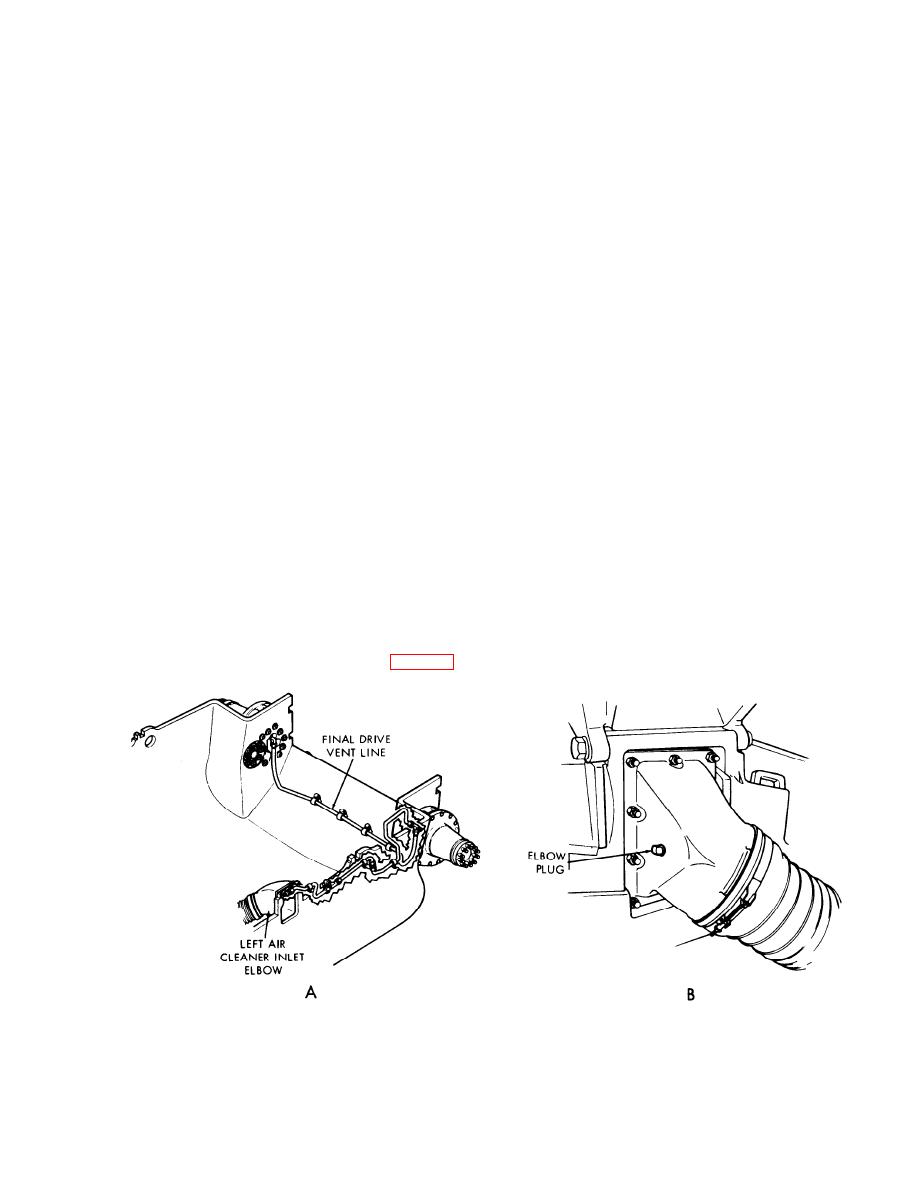
Figure 3-7. Final drive vent system inspection. |
|
||
| ||||||||||
|
|
 TB 9-2300-378-14
(1) Open top grille doors to expose top of fuel tanks and air cleaner outlet elbows.
Move to right side of vehicle.
NOTE
Two types of air cleaner outlet elbows may be found on
M48/M60 series. E a r l y model has no hole to accept fuel
tank vent lines and late model has a hole to accept a vent
line fitting.
(2) Inspect fuel tank for pressure of vent line from fuel tank to air cleaner.
(3) If vehicle is equipped with fuel tank to air cleaner vent system, go to step 4. If
not, go to step 8.
(4) Make sure valve arrow points toward right fuel tank. If installed incorrectly, fuel
will enter the air cleaner. Reverse valve installation, if required.
If any hoses are defective, replace (TM-20).
(6) I n s p e c t all fittings and connectors for cracks or other damage. Replace as
necessary (TM-20).
(7) C h e c k for loose, broken or cracked clamps, brackets or bushings. Replace as
necessary (TM-20). Go to step 10.
(8) Check outlet elbow for plug (late model vent hole). Install replacement plug if
missing.
(9) Tighten pipe plug securely.
(10) Close right side grille doors (TM-10).
Final Drive Vent System (Fig. 3-7).
b.
Figure 3-7. Final drive vent system inspection.
3-29
|
|
Privacy Statement - Press Release - Copyright Information. - Contact Us |
