 |
|||
|
|
|||
|
|
|||
| ||||||||||
|
|
 TM 3-4240-302-30&P-1
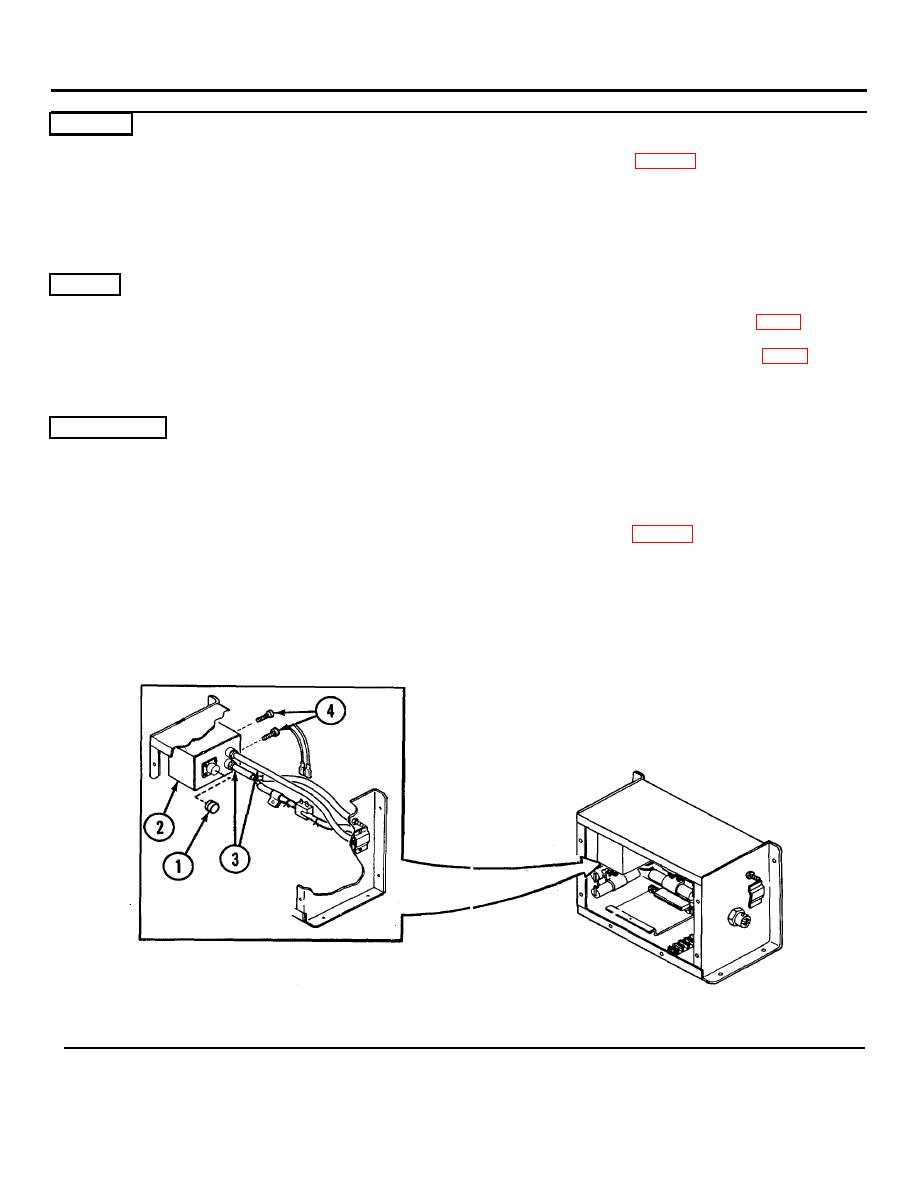
LOCATION
ITEM
ACTION
REMOVAL
Housing
Pressure transmitter MT2
1. Disassemble CCM (p. 2-77).
2. Remove connector (1) from pressure
transmitter (2).
3. Pull tubing (3) from pressure transmitter (2).
4. Remove two screws (4) and remove pressure
transmitter (2).
REPAIR
Nonmetallic tubing
Replace tubing if torn or broken (item 2, app B,
bulk materials).
Fabricate replacement tubing (3) (item 2, app B.,
bulk materials). Cut to same length as tubing being
replaced.
INSTALLATION
Pressure transmitter
1. Install pressure transmitter (2) using two
screws (4).
2. Connect tubing (3) to pressure transmitter (2).
Connect connector (1) to pressure
transmitter (2).
4. Reassemble CCM (p. 2-77).
NOTE
When installing rubber tubes, be sure
that tube (3) from pressure switch (5) is
connected to hose connector marked
LOW on pressure transmitter (2) and
that other tube (3) is connected to hose
connector marked HIGH on pressure
transmitter (2).
2-79
|
|
Privacy Statement - Press Release - Copyright Information. - Contact Us |
