 |
|||
|
|
|||
|
Page Title:
DISASSEMBLY AND REASSEMBLY OF TIMING BELT IDLER ASSEMBLY |
|
||
| ||||||||||
|
|
 TM 11-3895-209-14
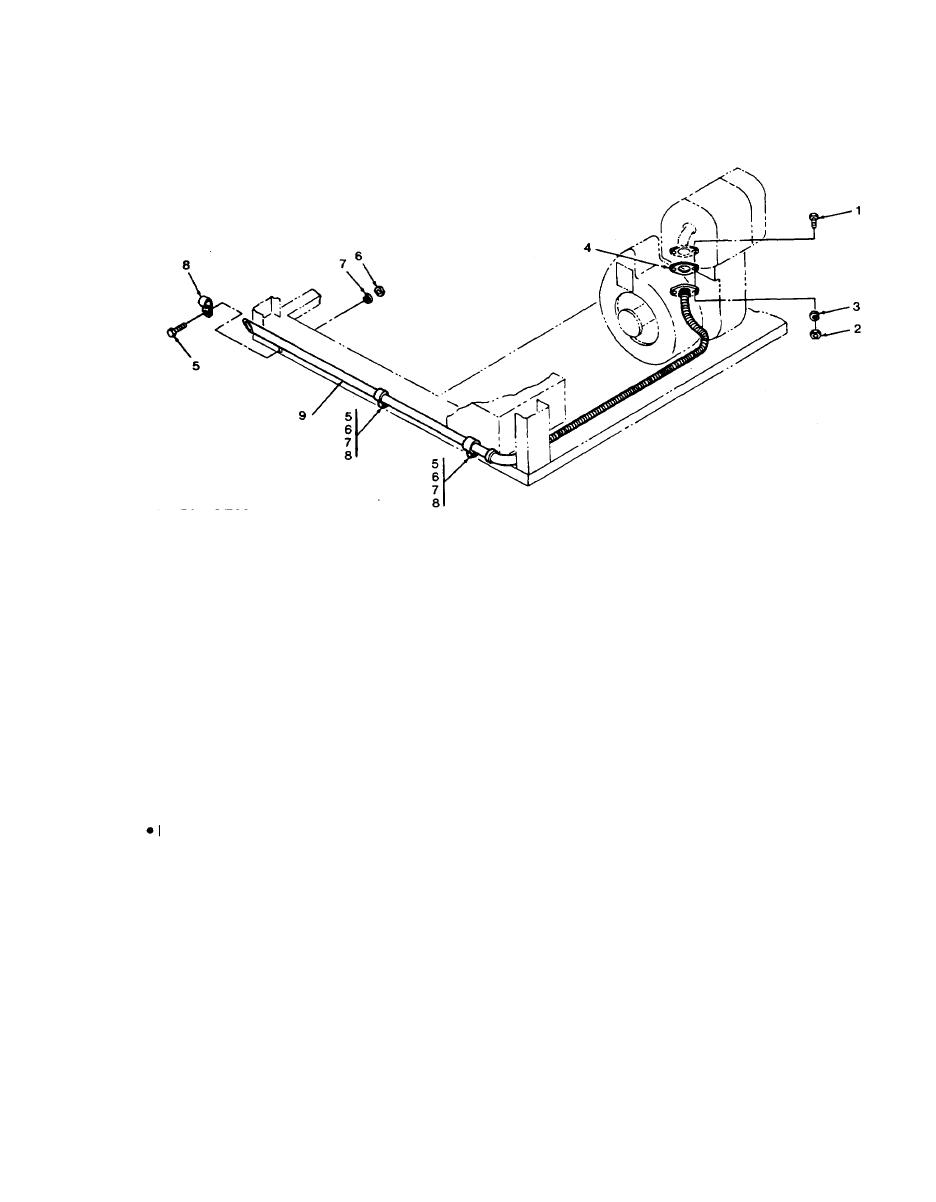
5-8. REMOVAL AND REPLACEMENT OF EXHAUST PIPE-Continued
REPLACEMENT
q
clamps so that the open end of each clamp is down, with the flat face turned inward.
B Place the exhaust pipe (9) in position on the frame of the equipment. Route the flexible section
of the pipe along the base of the frame between the toolbox and the corner post of the frame
and upward along the engine guard.
the engine manifold. Install and tighten the two bolts (1), nuts (2), and lock washers (3).
toolbox and the frame. Position the three exhaust pipe clamps (8) so that they are in line with the
mounting holes in the frame.
E Install and tighten the three bolts (5), nuts (6), and lock washers (7).
5-9. DISASSEMBLY AND REASSEMBLY OF TIMING BELT IDLER ASSEMBLY
DISASSEMBLY
A Remove the timing belt.
B Remove the two bolts(17) and
(21), nuts (20) and (23), lock
washers (19) and (22), and the
mounting bolt spacer (18) that
attach the idler assembly to the
frame.
C Remove the cotter pin (11),
washer (12), clevis pin (14), and
washer (13) that attach the idler
arm (15) to the idler base (24).
5-5
|
|
Privacy Statement - Press Release - Copyright Information. - Contact Us |
