 |
|||
|
|
|||
|
|
|||
| ||||||||||
|
|
 TM 10-7360-204-13&P
(8) Replace generator (para 4-9.2.).
NOTE
Position mixing chamber and air shutter assembly (7) so that the
generator packing nut is flush with air shutter assembly opening.
(9) Tighten screws (5).
(10) Replace top shield (para 4-9.1).
(11) Install flame valve knob in flame valve knob holder.
4-9.4 PREHEATER ASSEMBLY.
a. Preliminary Requirements.
(1) Remove top shield (para 4-9.1).
( 2 ) Remove generator (para 4-9.2).
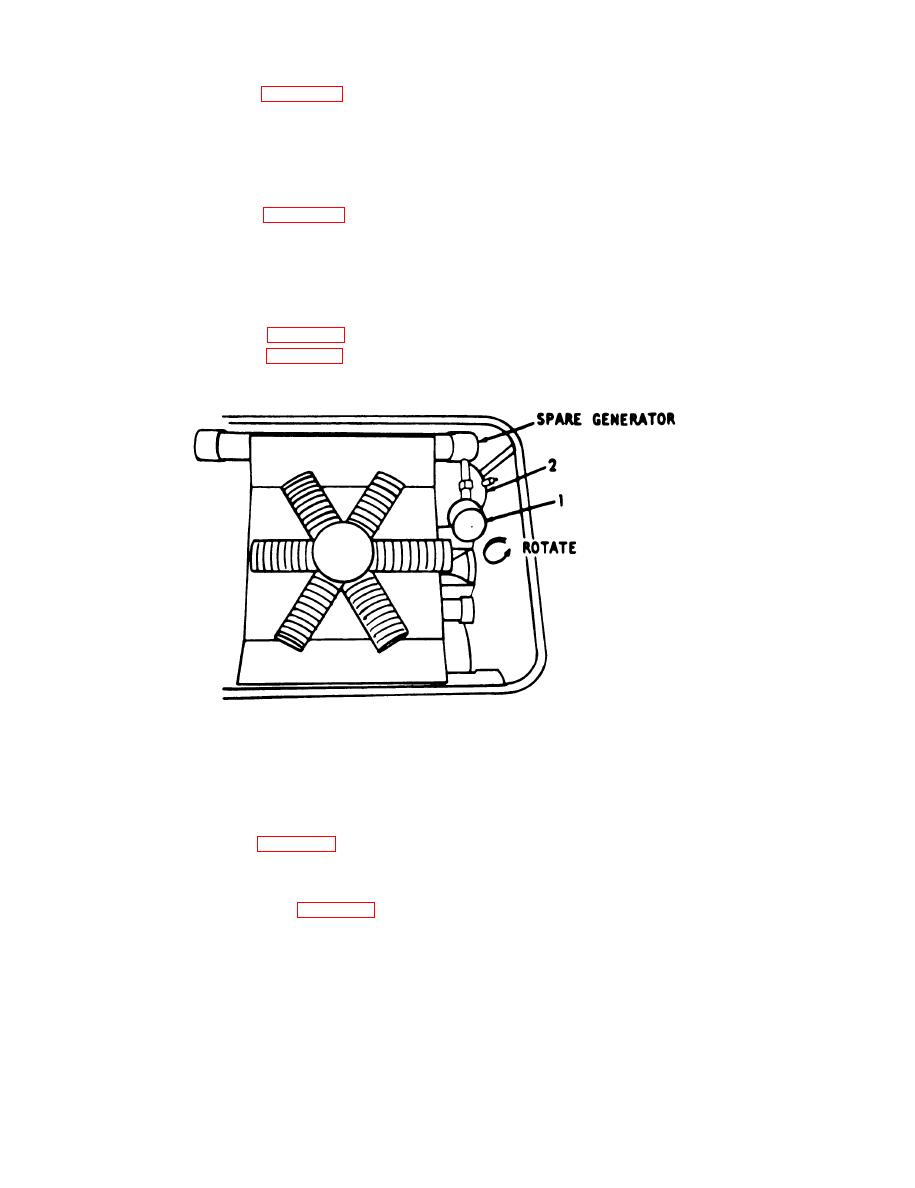
b. Removal.
(2) Remove preheater assembly (1) by rotating counterclockwise until it is removed from fuel
tank (2).
c. Disassembly. Refer to figure 4-1 and disassemble the preheater assembly to the extent necessary to
make repairs. Disassemble in numerical sequence.
d. Repair. In addition to replacing defective components of the preheater assembly, the preheater
valve may require packing. Refer to figure 4-2 to pack the preheater valve.
e. Reassembly. Depending upon the amount of disassembly, the preheater may be reassembled in the
reverse order.
CAUTION
Do not overtighten the preheater assembly.
f. Replacement. Replace the preheater. Turn the preheater clockwise to tighten.
4-12
Change 7
|
|
Privacy Statement - Press Release - Copyright Information. - Contact Us |
