 |
|||
|
|
|||
|
Page Title:
Disassembly of Differential and Carrier |
|
||
| ||||||||||
|
|
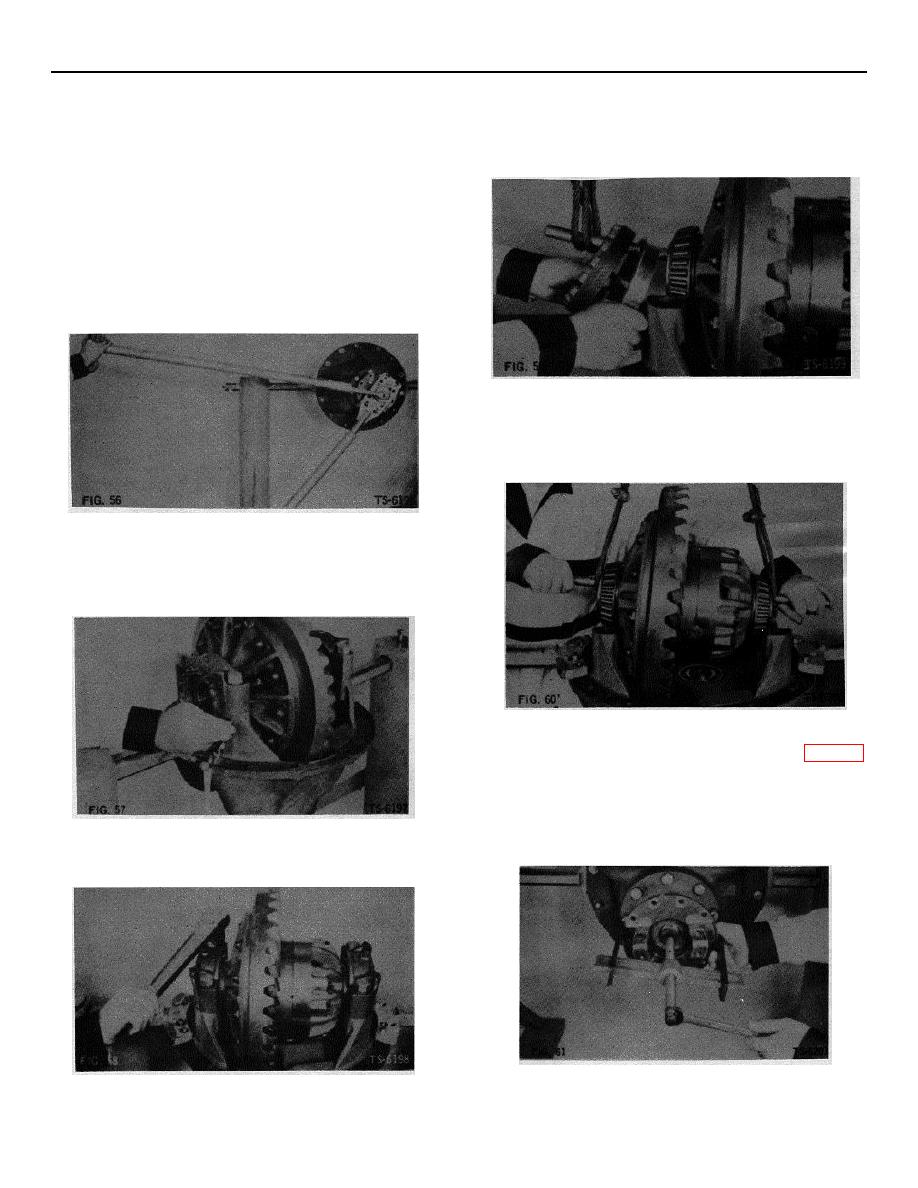 2. If axle is not equipped with parking brake,
5. Insert metal bar through differential to facilitate
companion flange nut should be loosened now to
hoisting.
Raise ends individually and remove
facilitate flange removal later. Position socket on
adjusting nuts and bearing cups (Fig. 59).
flange nut and then install flange retainer tool with
two spacers between tool and flange. Spacer
dimensions are given in Fig. 30. Loosen flange nut
(Fig. 56).
NOTE: Standard 2 %-inch socket will not fit flange
nut because socket walls are too thick to enter
flange. Machine socket as shown in Fig. 31 to
provide proper clearance.
6. Hoist differential with assembled bearing cones from
carrier assembly (Fig. 60). Tilt differential to allow
ring gear to pass web in differential carrier.
3. Remove lockwire and adjusting nut lock. Before
removing bearing cap bolts, use center punch to
matchmark bearing caps to 'carrier assembly. This
is to insure correct match in reassembly (Fig. 57).
7. If axle is not equipped with parking brake, remove
shaft nut that was loosened as shown in Fig. 56.
Re- move washer. Remove companion flange from
pinion shaft with puller (Fig. 61). If companion
flange was removed to provide access to parking
brake and re- installed to facilitate handling
differential, it can probably be removed by hand.
4. Remove bearing cap bolts and bearing caps (Fig.
58).
25
|
|
Privacy Statement - Press Release - Copyright Information. - Contact Us |
