 |
|||
|
|
|||
|
|
|||
| ||||||||||
|
|
 TM 11-6625-3017-14
SECTION 2
OPERATION
2.1 INSTALLATION
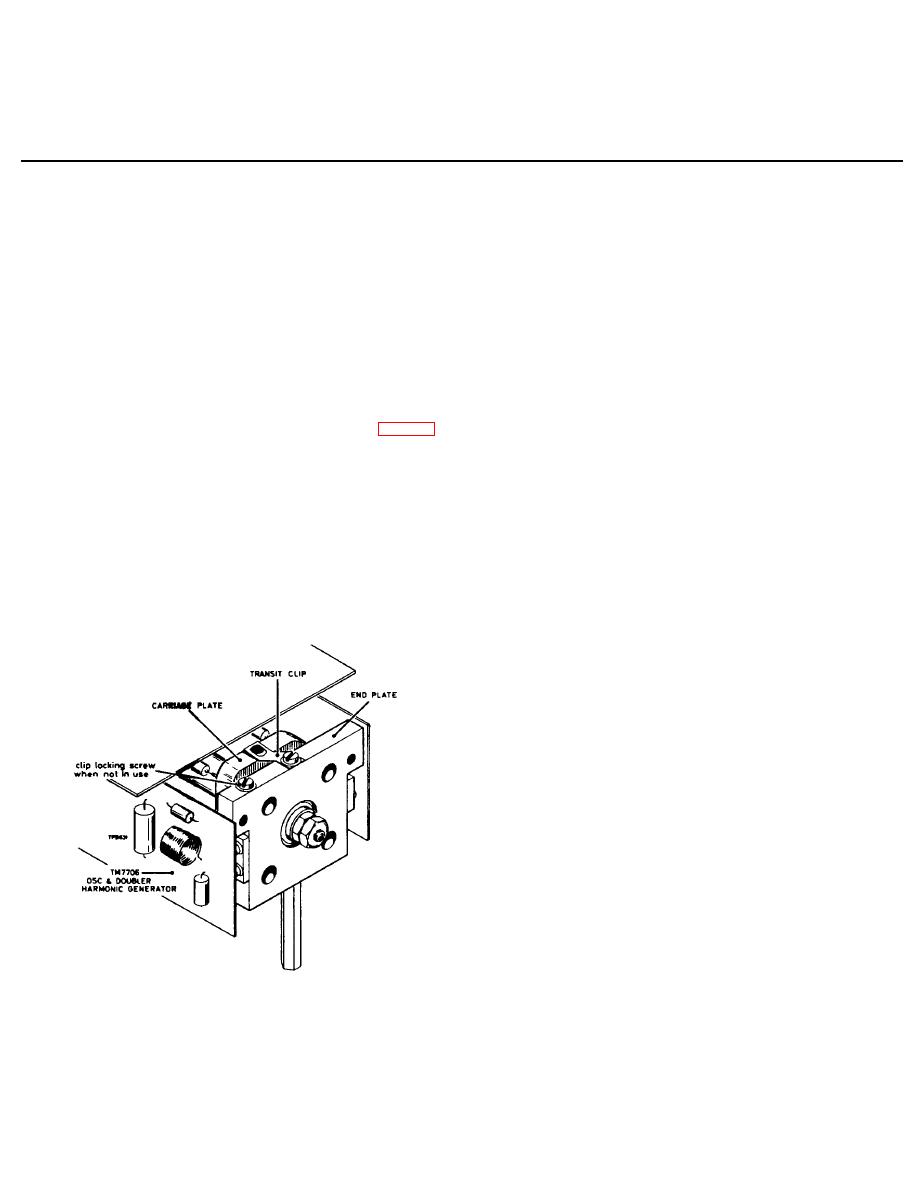
the clip. A 6 BA screw, otherwise housed in a second
The Modulation Meter type TF 2300A is available in
hole to one side of the clip in the end plate is inserted
two versions: with a case for bench mounting, or with a
through the clip and tightened down for long journeys,
dust cover for rack mounting.
The latter version,
including delivery.
designated TF 2300AR, fits a standard 19 inch rack.
To reach the clip, release the four screws at the corners
Before inserting the TF 2300AR into a rack, slides or
of the oscillator front panel and slide the oscillator partly
runners should be fitted to the rack to support the
out. For short journeys, the carriage need not be locked
instrument and aid location.
if the instrument is placed upright on a layer of padding,
preferably with the tuning mechanism set to the high
Transit precautions
frequency limit of its travel.
To prevent damage being caused to the moving parts by
Remove the locking screw before attempting to use the
shocks or vibrations in transit, a clip as shown in Fig. 2-1
is fitted. The tuning mechanism consists of a carriage
running on a worm screw turned by the control knob; the
carriage is mechanically coupled to ferrite tuning slugs in
the variable inductors. The transit clip locks the carriage,
2.2 POWER SUPPLY
and this must be released before the oscillator can be
used. At the high frequency end of carriage travel, a
tapped hole in the top of the brass carriage comes in line
The modulation meter may be used with a. c. mains or
with a hole in
batteries.
2.2.1
Mains supply, 110-230 V
The socket of the lead provided with this instrument
fits into the plug on the rear panel. The other end of the
lead must be fitted with a plug by the user. The three
conductors are provided with identification sleeves for
this purpose, as follows:
Color
Connection
Sleeve
Symbol
Brown
Line
Blue
Neutral
Black
WhiteN
Yellow/GreenEarth
Yellow
(Green)
Before plugging in to the mains supply, check that
the fuse rating and mains voltage setting are correct.
For voltages around 230 V, a 100 mA fuse is fitted; for
110 V, this must be changed to 160 mA. Check that the
h. t. fuse is 500 mA and note that it is a quick-blow type.
To change the mains voltage switch setting, remove the
L-shaped
Fig. 2-1. Oscillator transit locking arrangement
2-1
|
|
Privacy Statement - Press Release - Copyright Information. - Contact Us |
