 |
|||
|
|
|||
|
|
|||
| ||||||||||
|
|
 FUEL SYSTEM
TESTING AND ADJUSTMENT
More than 10 drops in 15 seconds is an indication of
parts with too much wear or bad parts, and
replacement of the fuel injection nozzle is necessary.
Tightening Locknuts and Cap
1. Remove the fuel injection nozzle (5) from the 8S2267
Nozzle Tester (2) and put it in the 8S2250 Nozzle
Holding Tool (11).
2. Tighten the locknut (6) holding the pressure adjustment
screw (7) to 70 to 80 lb. in. (80.7 to 92.2 cm. kg).
TIGHTENING PRESSURE SCREW LOCKNUT
(Typical Example)
3. Tighten the locknut (9) holding the lift adjustment screw
(10) to 35 to 45 lb. in. (40.4 to 51.9 cm. kg).
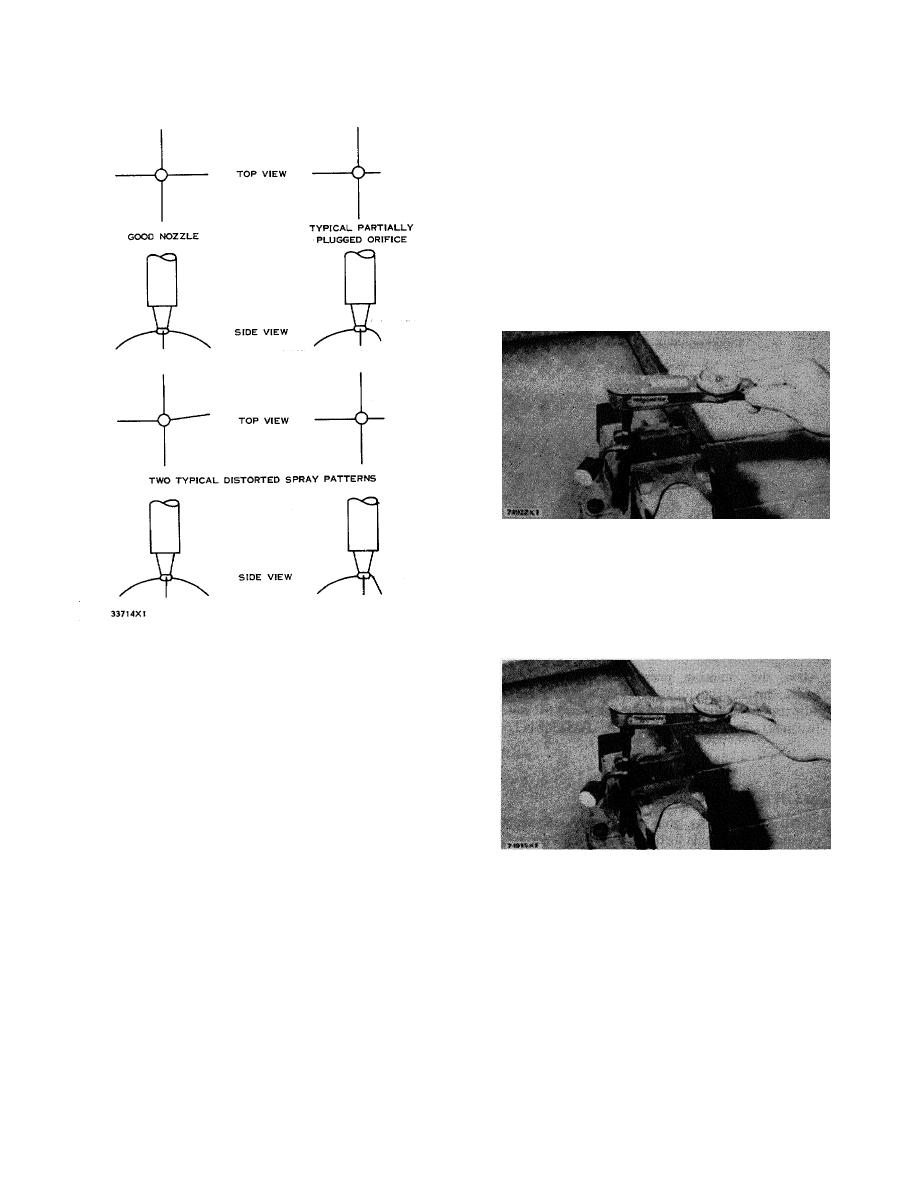
ANALYSIS OF NOZZLE SPRAY PATTERN
3. Make a slow increase in pressure and look at the spray
pattern when fluid begins to flow through the fuel injection
nozzle. The spray must be the same through all four
orifices. Any change, either vertically or horizontally, is an
indication of a bad nozzle. See the ANALYSIS OF
NOZZLE SPRAY PATTERN.
Return Leakage Test
1. Put the tip of the fuel injection nozzle a little above the
horizontal position. Tighten the nuts that connect the
fuel injection nozzle to 'the tester.
TIGHTENING VALVE LIFT SCREW LOCKNUT
(Typical Example)
2. Operate the tester until the pressure is at 1400 to 1600
psi (98.4 to 112.5 kg/cm2).
4. Install a new O-ring seal (8). Install cap (1) and tighten
to 110 to 120 Ib. in. (126.8 to 138.4 cm. kg).
3. Look at the leakage from the return at the top (pressure
screw end) of the fuel injection nozzle. After the first
two drops fall, leakage is 1 to 10 drops in 15S seconds
with SAE J967b oil or Kent-Moore J23300-585 or Shell
NOTE: Be sure to install a new O-ring seal (8) before
66631 calibration oil, with the temperature of the
installing the cap.
calibration oil at 65to 75 (18to 24 ).
F
C
48
|
|
Privacy Statement - Press Release - Copyright Information. - Contact Us |