 |
|||
|
|
|||
|
Page Title:
Reassembly of Planet Carrier (CONT) |
|
||
| ||||||||||
|
|
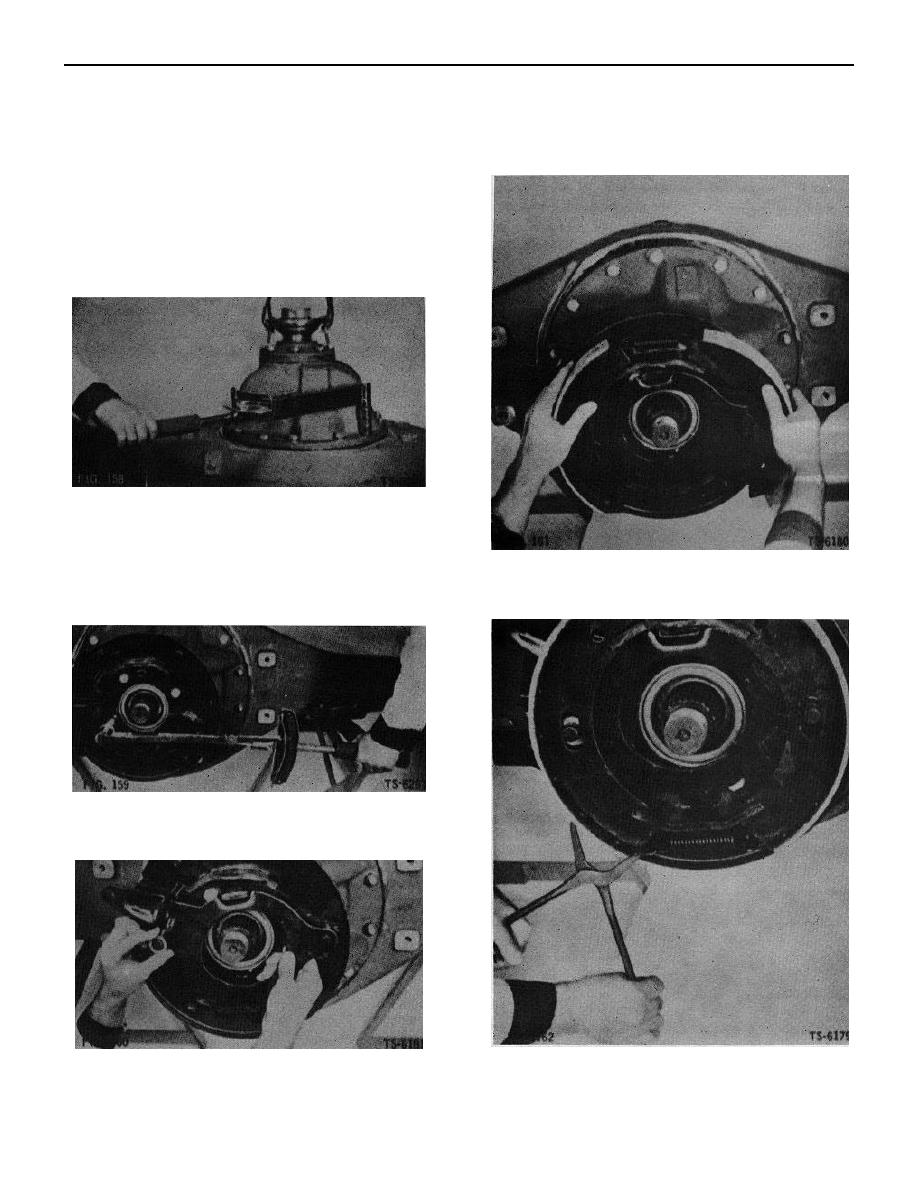 3. Secure differential carrier to axle housing with bolts,
6. Assemble parking brake shoes and upper brake shoe
nuts, washers, and tapered dowels (Fig. 158}.
return spring. Spread shoes apart and position shoes
Tighten nuts on the four studs first, then tighten all
on brake backing in engagement with operating cam
bolts evenly until they are snug. Tighten all nuts and
lever and roller (Fig. 161).
bolts to specified torque.
NOTE: Some axles use bolts of several different
lengths without nuts and dowels. Determine length of
bolt required by checking thickness of differential
carrier flange and depth of mounting holes. Select
correct bolt for each position.
FIG. 158
4. On axles which incorporate a parking brake, remove
companion flange which was temporarily installed to
facilitate hoisting differential. Position parking brake
FIG. 161
backing plate on differential and carrier assembly and
7. Install lower brake shoe return spring with brake
secure with four bolts and lockwashers. Tighten bolts
spring pliers (Fig. 162).
to specified torque (Fig. 159).
FIG. 159
5. Position brake operating cam lever and roller on
brake backing plate (Fig. 160).
FIG. 162
FIG. 160
47
|
|
Privacy Statement - Press Release - Copyright Information. - Contact Us |
