 |
|||
|
|
|||
|
|
|||
| ||||||||||
|
|
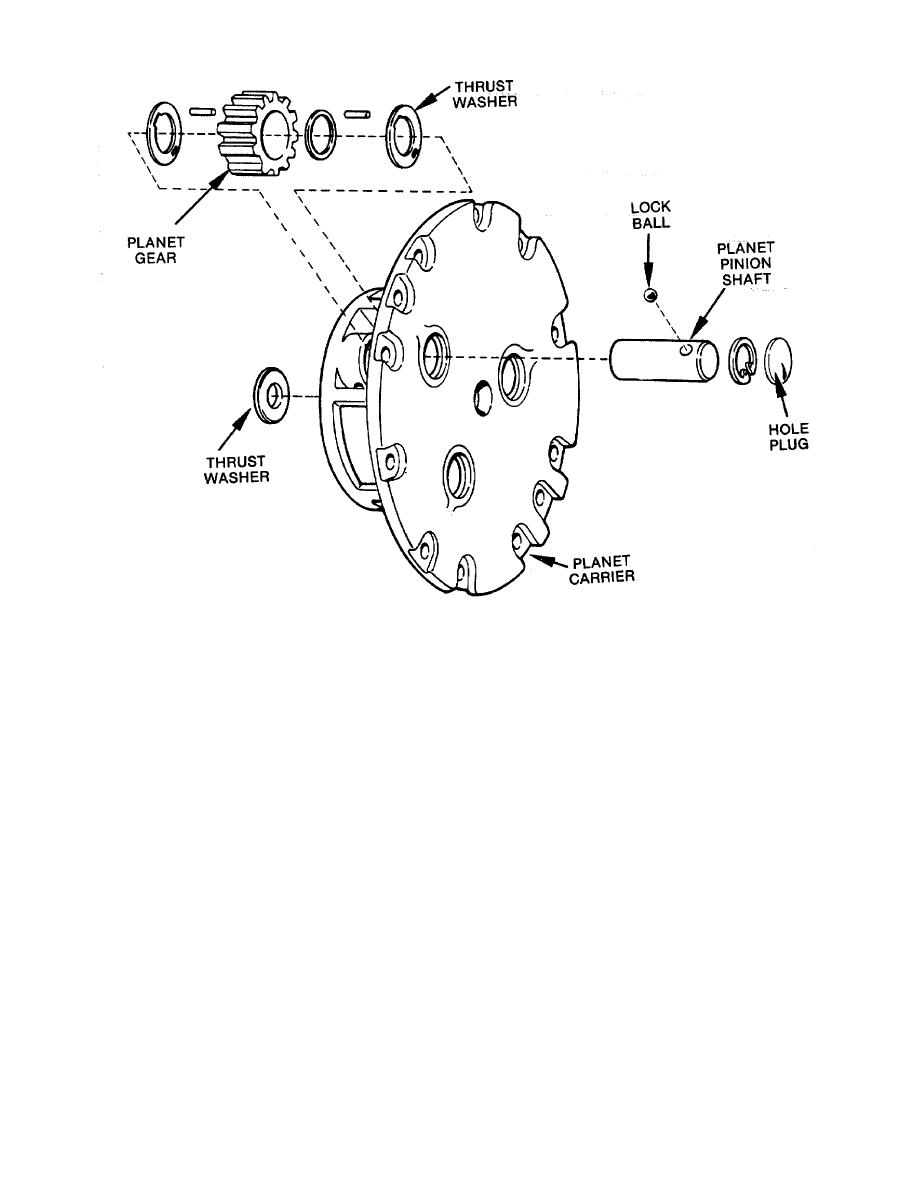 AXLES:
Planetary Carrier Assembly
5.
Install wheel bearing adjusting nut. While
DRIVE AXLE REASSEMBLY:
tightening nut, rotate wheel hub, and rap with a rubber or
1.
Being certain housing face is clean, apply
rawhide mallet until a definite drag is felt. Install sun gear
Permatex No. 2 and install differential and carrier in
thrust washer and adjust wheel bearing preload.
housing,
securing in place on housing studs and
6.
Use Permatex No. 2 on face of wheel hub and
tightening nuts to specified torque (refer to TORQUE
install a new O ring when installing planet spider
SPECIFICATIONS CHART).
assembly in position. Secure In place with special
2.
If spindle ends have been removed from
capscrews and lockwashers provided.
Tighten to
housing, secure in place with special bolts, nuts and
specified torque (refer to TORQUE SPECIFICATIONS
washers provided. Tighten to specified torque (refer to
CHART).
TORQUE SPECIFICATIONS CHART).
7.
Assemble sun gear in place on axle shaft and
3.
Install inner and outer hub bearing cups into
place retaining ring in position in groove on shaft.
hub assembly. Place inner hub bearing cone in position
8.
Insert splined end of shaft into axle housing,
and install hub oil seal with lip of seal toward bearing. Fill
aligning splines with differential side gear and aligning
oil seal lip with clean grease. Assemble hub on spindle.
gear teeth on sun gear with teeth on planet pinions.
4.
Assemble internal gear into internal gear hub,
9.
Use Permatex No. 2 on face of planet spider
securing in place with special capscrews provided.
and install a new O ring when installing hub thrust cap
Tighten to specified torque (refer to TORQUE
assembly in position. Secure in place with capscrews and
SPECIFICATIONS CHART). Assemble outer hub bearing
lockwashers and tighten to specified torque (refer to
cone in place on internal gear hub and assemble gear,
TORQUE SPECIFICATIONS CHART).
hub and bearing in position on housing.
Rev. 760501
K300
50-3.8
|
|
Privacy Statement - Press Release - Copyright Information. - Contact Us |
