 |
|||
|
|
|||
|
|
|||
| ||||||||||
|
|
 TM
3-4240-309-20&P
LOCATION
ITEM
ACTION
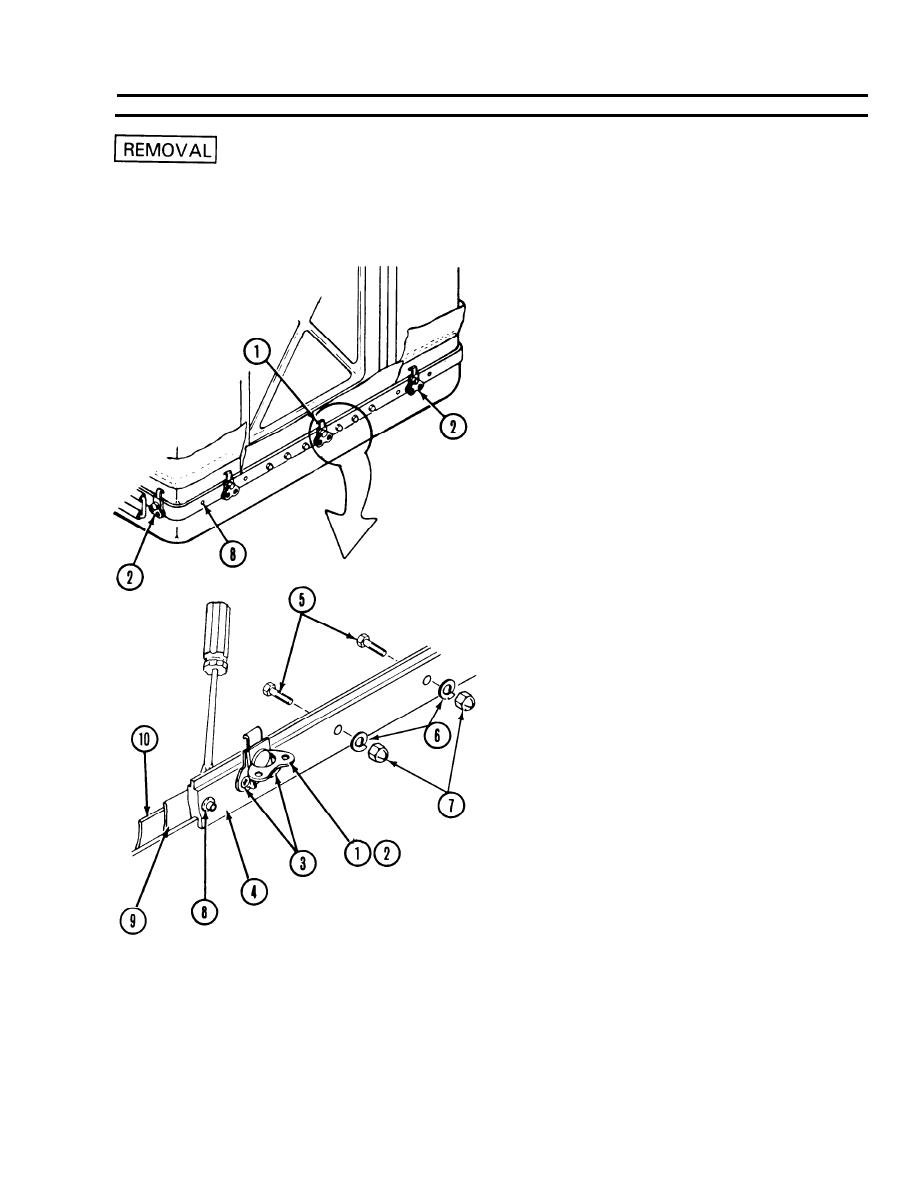
Protective Entrance
Clamping catch
NOTE
The PE has three clamping catches per side
(12 total). For the clamping catch (1) directly
under the PE outer door, follow steps 1
through 3. For the remaining 11 clamping
catches (2), follow steps 1 and 3.
1. Using 3/16 inch twist drill, drill heads off two
rivets (3) securing clamping catch (1, 2) to edge
frame (4).
2. To remove clamping catch (1) directly under
the PE door, remove two bolts (5), Iockwashers
(6), and acorn nuts (7) on each side of the
clamping catch (1).
NOTE
The rest of the edge frame (4) is secured with
rivets (8) which are not removed.
3. To remove clamping catches (2) other than the
one under the door, use a flat tip screwdriver
to carefully pry edge frame (4) from fabric (9)
and clamping strip (10) just far enough to
remove rivets (3). Using a 3/16 inch drive pin
punch and hammer, push drilled out rivet
between edge frame (4) and fabric (9). Remove
and discard damaged clamping catch.
NOTE
Clamping strip (10) may be bent during removal
of the rivets (3). Use a mallet to restore it to
the original shape.
2-83
|
|
Privacy Statement - Press Release - Copyright Information. - Contact Us |
