 |
|||
|
|
|||
|
|
|||
| ||||||||||
|
|
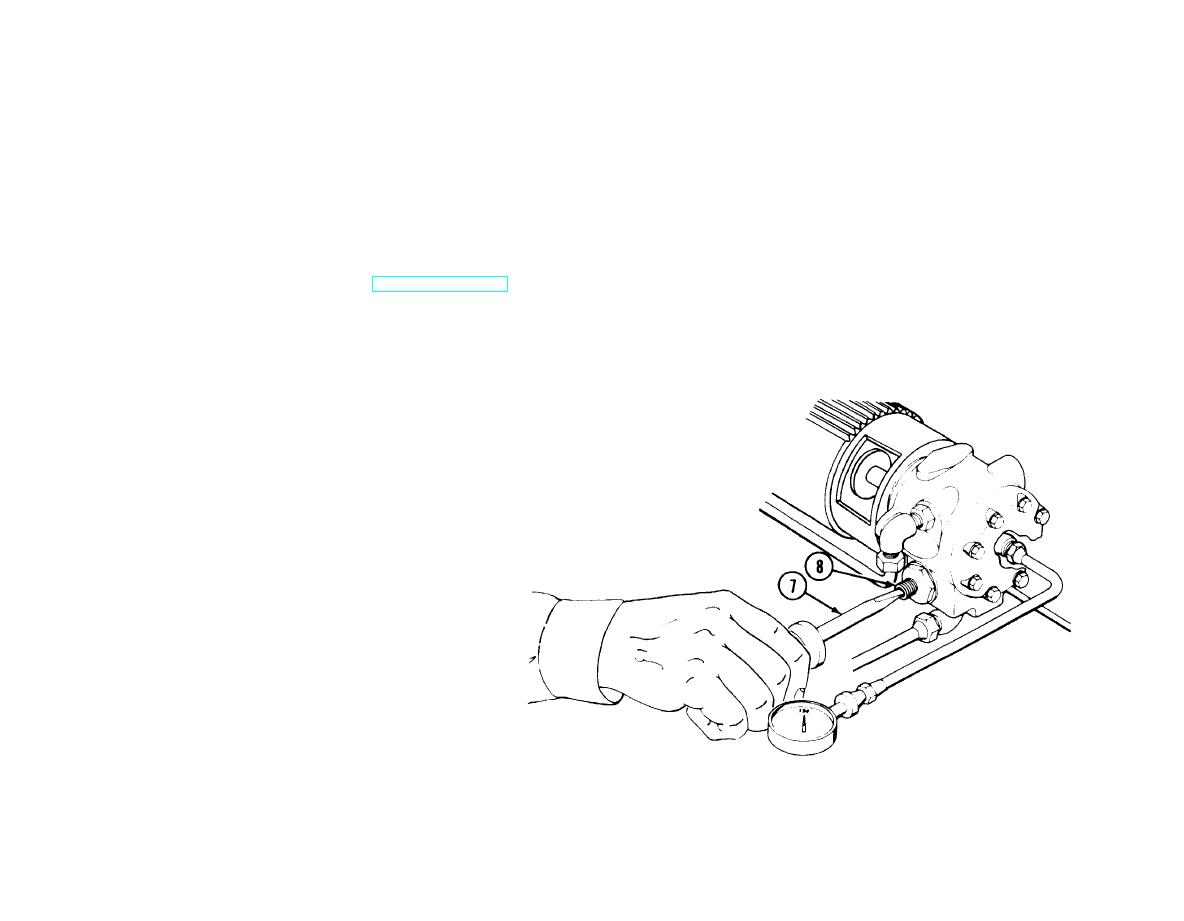 Step 12. Monitor the pressure to make sure it reads 150 psi. Turn the
pressure adjusting screw (7) (located where the end cap nut
was removed) clockwise or counterclockwise, as necessary,
until an indication of 150 psi pressure is reached. When the
pressure is 150 psi on the test indicator, place the HEATER
ON/PURGE ON switch to PURGE ON position. Screw the end
cap nut (4) onto the rotary power-driven pump adjustment
port (8).
Step 13. See TM 3-4230-209-10 for instructions on how to shut down
the pump unit assembly.
Step 14. Disconnect power cable assembly from the pump unit assem-
bly.
TM 3-4230-209-30&P
2-221
|
|
Privacy Statement - Press Release - Copyright Information. - Contact Us |
