 |
|||
|
|
|||
|
|
|||
| ||||||||||
|
|
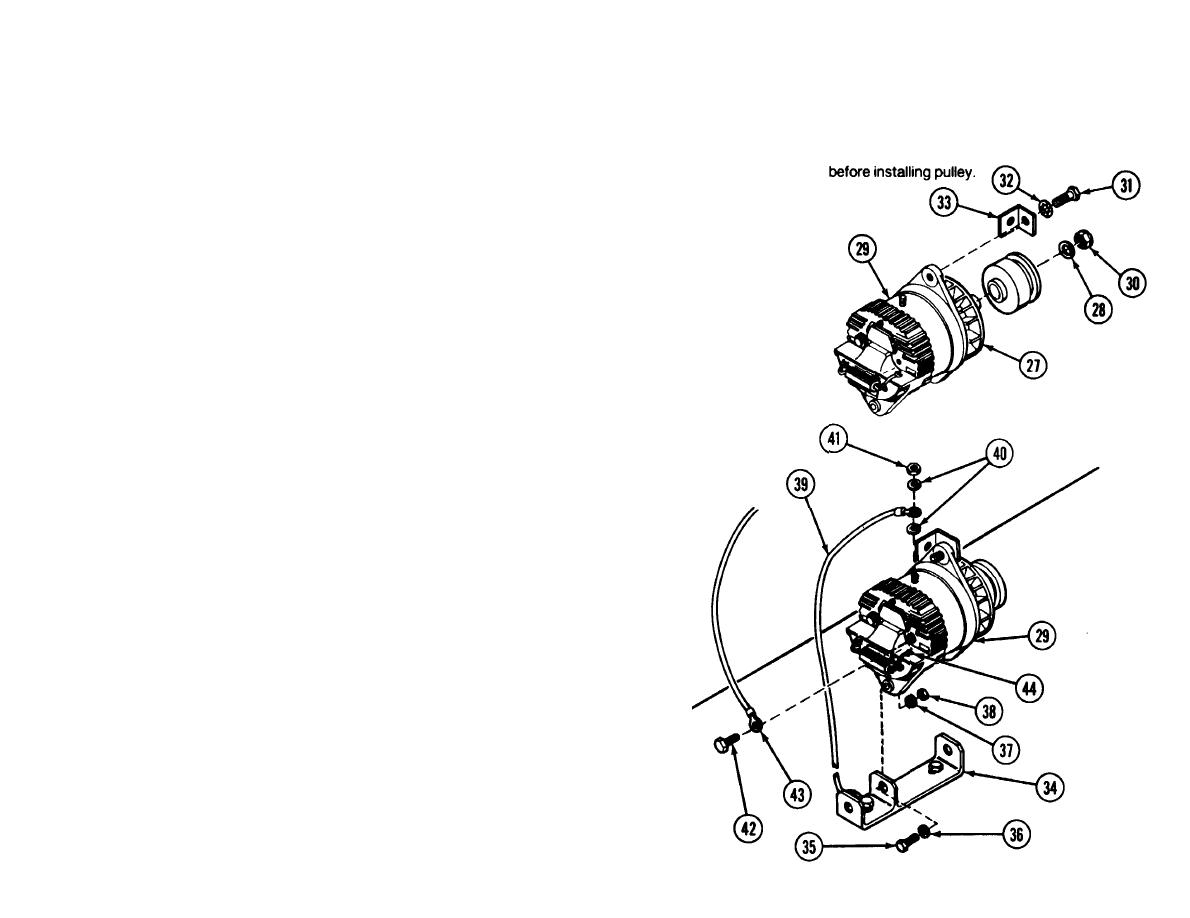 Skid Base Subassembly/
Make sure woodruff key is installed on alternator
Slide groove pulley assembly (27) and flat washer (28) onto the shaft of
Groove pulley
shaft
alternator (29). Screw on self-locking nut (30). Hold groove pulley assem-
assembly (27)
bly (27) and keep it from turning while self-locking nut (30) is being tight-
Flat washer (28)
ened. Torque self-locking nut (30) to 70 foot pounds.
Alternator (29)
Self-locking nut (30)
Insert hexagon head cap screw (31) through internal tooth lock
Hexagon head cap
washer (32) and alternator bracket (33). Install hexagon head cap
screw (31)
screw (31) into the alternator (29) and tighten hexagon head cap
Internal troth lock
screw (31).
washer (32)
Alternator bracket (33)
Position alternator (29) onto alternator support (34) and aline the holes.
Alternator support (34)
Insert two hexagon head cap screws (35) through two internal troth lock
Hexagon head cap
washers (36), alternator (29), and alternator support (34). Slide two inter-
screws (35)
nal tooth lock washers (37) onto two hexagon head cap screws (35) and
Internal tooth lock
screw two hexagon plain nuts (38) onto hexagon head cap screws (35).
washers (36)
Install nuts loosely.
Internal tooth lock
washers (37)
Grasp the top of alternator (29) and pull until V belt (21) is tight.
Hexagon plain nuts (38)
Tighten two hexagon plain nuts (38) on cap screws (35).
Install terminal of ground cable (39) on stud
on top of alternator (29) and fasten with flat
Ground cable (39)
washers (40) and nut (41).
Flat washers (40)
Nut (41)
Remove hexagon head cap screw (42). Posi-
Hexagon head cap
tion cable (43) and terminal of resistor (44)
screw (42)
onto hexagon head cap screw (42) and install
Cable (43)
it back into rear of alternator (29).
Resistor (44)
TM 3-4230-209-20&P
2-99
|
|
Privacy Statement - Press Release - Copyright Information. - Contact Us |
