 |
|||
|
|
|||
|
Page Title:
REMOVAL AND REPLACEMENT OF TIMING BELT |
|
||
| ||||||||||
|
|
 TM 11-3895-209-14
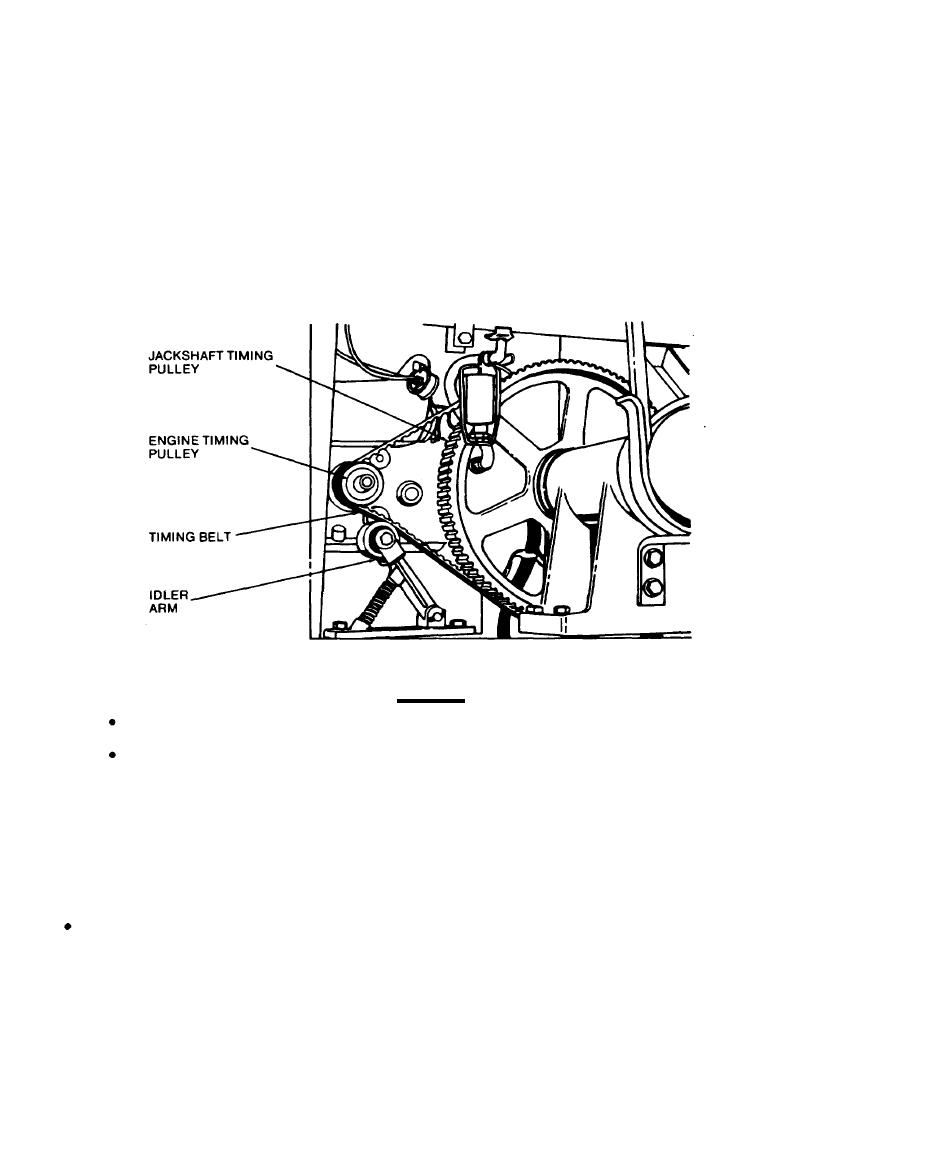
3-6. REMOVAL AND REPLACEMENT OF TIMING BELT
REMOVAL
A Release the three fasteners and open the large door of the guard assembly.
B Hold the idler arm away from the timing belt to release the tension. If necessary, tie the idler arm
in this position until the new belt is installed.
C Slide the timing belt off the jackshaft timing pulley (toward the engine).
D Remove the timing belt from the engine timing pulley.
E Do not release the idler arm.
REPLACEMENT
q
CAUTION
Be sure that the teeth of the belt mate properly with the teeth of the timing pulleys.
Be sure that the belt has the correct amount of tension (belt depressed approximately
3/8 inch by the idler tension).
A Replace the timing belt to the engine timing pulley.
B Slide the timing belt toward the jackshaft timing pulley,
C Release idler arm to increase timing belt tension.
3-7. REMOVAL AND REPLACEMENT OF UPPER AND LOWER DRIVE BELTS
REMOVAL
A Release the fasteners and open doors.
B Remove the two bolts, lock washers, and flat washers that secure the belt spacer to the jack-
shaft assembly, and remove the belt spacer.
C Disengage the upper axle drive belt from the jackshaft pulley. If necessary, operate the control
lever to the brake position to release all tension from the idler.
3-6
|
|
Privacy Statement - Press Release - Copyright Information. - Contact Us |
